In one of our earlier posts, we mentioned that some clients need their 3D models to have a “UV map.” Let's quickly talk about what that means.
The process of creating a UV map is called UV unwrapping. Once we have captured a scan or created a 3D model, we then create a UV map to optimize the texture. Now we can give life to the 3D model and make it look more realistic (or stylized) depending on the desired output. For example, we are able to better “clean” the texture or brighten a certain area and then “project” the texture over the UV map. Essentially, UV mapping is the process of translating your 3D mesh into 2D information so that a 2D texture can be wrapped around it.
Here is an example:
Texture map for Air Jordan 3 sneaker
UV map used to wrap different textures around an Air Jordan 3 sneaker model.
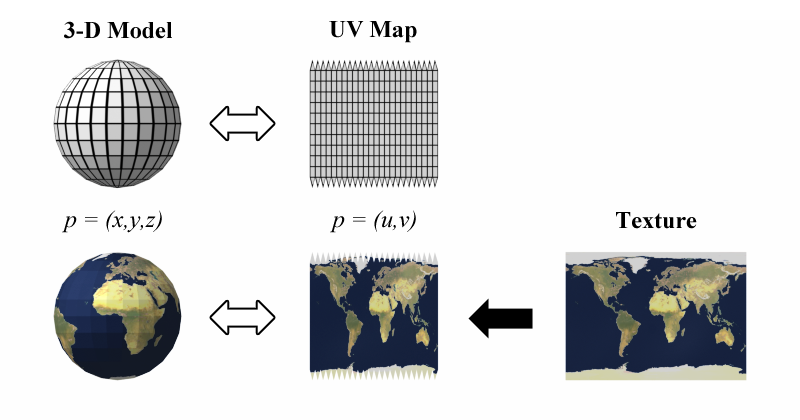
A UV map is the flat representation of the surface of a 3D model that we can use to easily wrap textures. The U and V refer to the horizontal and vertical axes of the 2D space, since X, Y and Z are already being used in the 3D space.
This shows the basic idea behind creating a UV map:
We have extensive experiencing 3D scanning people and objects and creating UV maps, which can then be used for digital marketing or cataloging, animation or augmented/virtual reality (AR/VR).


Comments